Attendance Tool
A tutorial on how to use Bb Attendance tool to record attendance.
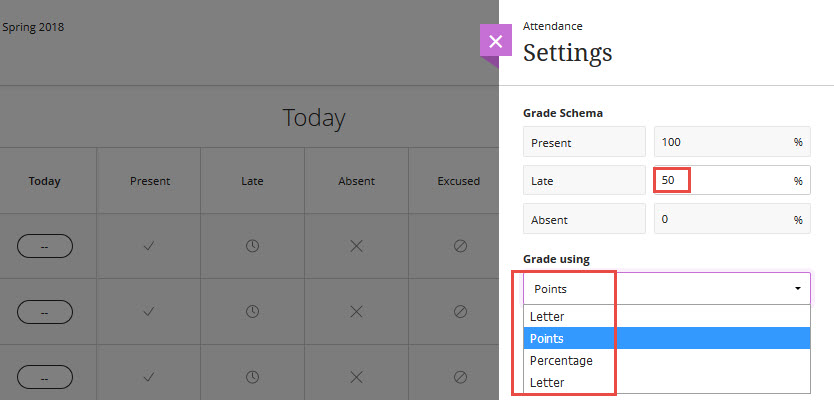
The Bb Attendance tool enables instructors to mark and record attendance. It has four (4) possible marks: present, absent, late, and excused. Present is scored 100% while absent is 0%. Late is scored 50% by default. However, you can change the percentage score for Late to any other value.
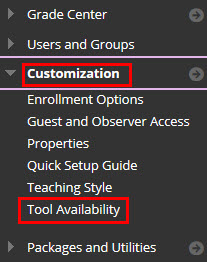
1. In the "Course Management" section located at the bottom left, click Customization, then "Tool Availability".
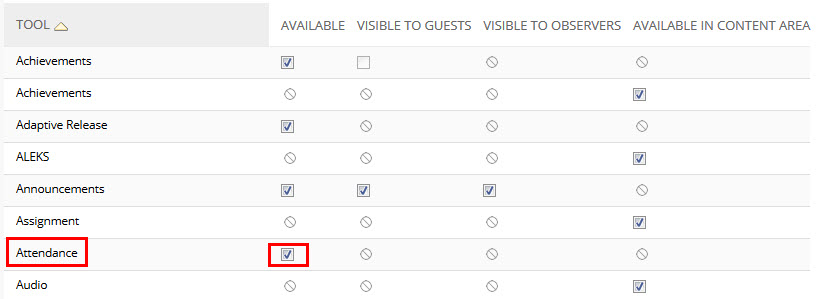
2. On the "Tool Availability" page, check the check box for Attendance. Then click Submit.
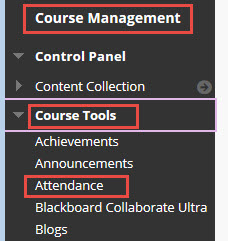
3. In the "Course Management" section, click "Course Tools", then Attendance. Now an Attendance column is added to the course grade center automatically, and the grades in this column will be updated whenever you record attendance for your class. You always access the attendance sheet from "Course Tools" > Attendance.
4. The attendance Settings panel is displayed on the right. You can change the score for Late here. Click the dropdown box under "Grade using" to determine how you want the attendance grade displayed. Click the "Save" button at the bottom right to save the changes.
5. Now the attendance roster is displayed where you can record the attendance. At the same time, a grade column called Attendance is also created in the Grade Center.
- If the attendance is not part of your course grade, go to the Grade Center. Edit the column information for Attendance column to check No for both "Include this column in Grade Center calculations" and "Show this column to students."
- If the attendance is part of your course grade, we strongly recommend that you actually record students' participation in your class, not merely present in your class meetings, be it in-person or online.
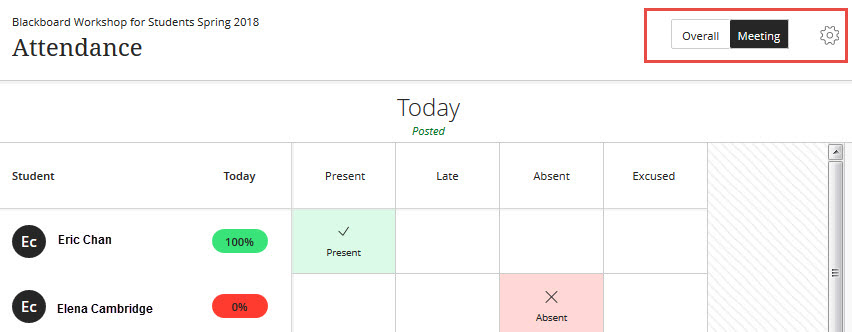
6. To record the attendance, you can click the appropriate box for each of the students one by one. Alternatively, you can click Present, then "Mark all present" for all students. Afterward, click the box under Late, Absent or Excused for the student who was late, absent, or excused.

7. You can toggle the views between a specific Meeting day and Overall by clicking the respective buttons on the top right on the attendance screen. Click the gear icon to modify the settings.
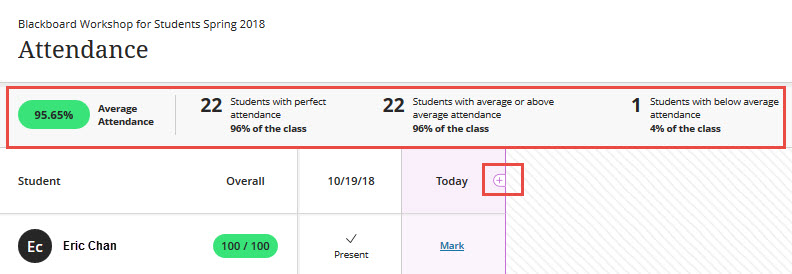
8. To add a day, get on the Overall view. Then move the cursor next to the day where you want to add. A plus sign "+" appears. Click on it. A column is added with the date "Today". The statistics of the class overall attendance is displayed on the top.
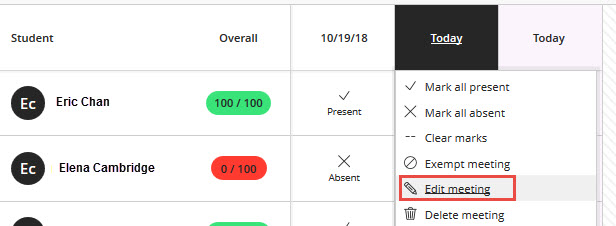
9. To modify the date, on the Overall view, click on the date and select "Edit meeting".
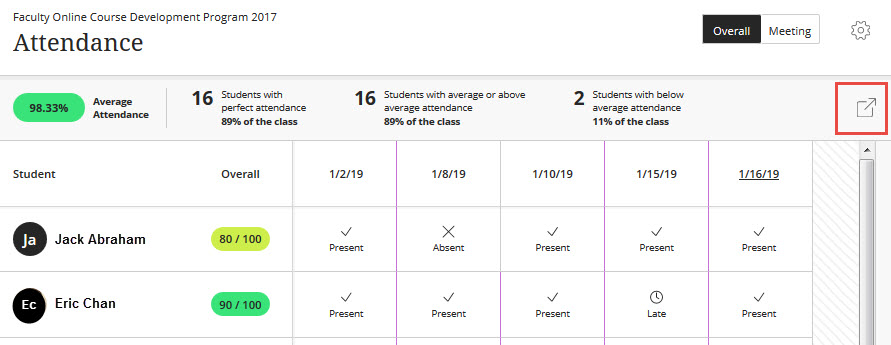
10. To download the attendance to a spreadsheet, click the square with an arrow icon on the top right. Save the file to your computer.

Revised: January 21, 2026