Oral Final Exams
On this page you will find information on how to prepare and conduct oral midterm or final exams.
Why considering oral exams
- Oral exams can effectively demonstrate students’ deep learning. “When taking an oral exam, you really need to know what you are talking about.”
- Oral exams are realistically cheat-proof.
- Oral exams can mitigate student-instructor English language communication problems. English may not be your students’ home language. Be extra mindful of possible communication issue if English is not your home language either.
- Grading an oral exam (component) can take less time than grading a written exam.
- Scheduling oral exams can be flexible and no proctors are needed. Within the parameters set by the Registrar, you set a time frame with time slots to indicate your availability to administer oral exams. Your students pick the time slot that best fits their schedule.
Preparing for an oral final exam (component) from Day One
If deep learning is your goal, students need to learn how to “do” deep learning.
If an oral final exam (component) is one of the most important tests of deep learning you need to effectively communicate this to your students. You also need to let them know that deep learning is something they can learn, and that you are committed to teach them to learn this.
Scaffolding - the key to this teaching and learning process
Scaffolding comfort zones of feedback
From the start of the semester make students audio-record themselves and make them reflect and comment on their recordings. Then gradually make them share recordings in ever wider circles and let them get comfortable receiving feedback from within ever less immediate comfort zones: from a trusted friend or family member to a classmate to a small group, to the whole class.
Scaffolding challenges
In this process, let students perform increasingly challenging tasks: from defining words, to summarizing, to outlining procedures, to explaining concepts, to making comparisons, …
Scaffolding instructor feedback
Let your students understand how you are planning your point of entry and participation in the ever-widening comfort zones. For example, that, unless they give your permission or ask for it, you are not going to listen to their three first recordings and will only read their reflection on the comments they received.
How does it work?
In your syllabus
First tell your students that the midterm and final exams, or any other summative assessments will be conducted in oral format, and describe how it operates. For example, each of the students will draw 3 questions in a pool at the scheduled time and has 15 min to prepare (open book.) Then each student will present their response in a 15 (or so)-minute conversation with the instructor. If it is online, state the technology tool that will be used, e.g. Zoom, and provide a practice room where students can test it out.
Next, tell students that there will be scaffold assignments to prepare them for the oral exams. Explain why it is important to be able to express what they learn orally.
Preparing from day one
Develop assignments that require students to answer questions related to course topics orally and be recorded using their phones.
At the beginning, ask students to respond to questions at the knowledge and comprehension levels and use the first two criteria of the following rubric to assess their responses by themselves, their peers or/and the instructor. Gradually ask students to respond to questions that require critical thinking and higher order learning, and use all three criteria in the rubric to assess their responses.
Sample scaffold rubrics
Rubrics | Beginning | Developing | Proficient |
|---|---|---|---|
Understanding of the concepts | Do not have grasp of the concepts. | Can answer questions partially with some explanations. | Demonstrate full understanding of the concepts with explanations. |
Communication of ideas | Uncomfortable to express ideas, the responses are difficult to understand. | Express ideas comfortably, but need more work to make the ideas clearer. | Express ideas comfortably in a logical way and it is easy to understand. |
Critical thinking | Cannot make connections among ideas, concepts; lack of ability to compare or contrast, synthesize, or analyze issues or points of views. | Make connections among ideas, concepts in a limited way; some ability to compare or contrast, synthesize, or analyze issues or points of views. | Demonstrate the ability to make connections among different concepts, ideas; compare or contrast, synthesize, or analyze issues or points of views |
Commenting on recordings
You can use either Discussion Board or Blog in Bb for students to post their audios with their answers to questions. You and students can listen to and comment on the audios based on a standard rubric.
Technically, how to do it?
Preparing an oral exam
Technically, preparing an oral exam involve the following steps.
Setting up questions
Brightspace Quizzes tool has a feature that enables you to create a pool of questions students can draw in an exam. To be fair, you add exam questions about the same concepts and at similar difficult level to one random block. Depending on the number of concepts/topics you want to include in an exam and how you want to integrate some concepts into one exam question, you will create a few random blocks, each is for the same concept(s). Next, you create the exam and set it to take questions from the random blocks, with one question from each of the blocks. This will provide possibility that students get different questions but for the same concepts and at the same difficult level.
Follow the steps in the tutorial on how to create an exam that gives different questions to different students for your course.
Scheduling the exam
You can set up the exam schedule using Bb Wiki tool.
- Create a Word file called "Exam Schedule Sign-up" on your OneDrive and grant students access to it. The tutorial on how to do this listed linked below.
- Add a table in the Word file with two columns and as many rows as needed to hold the possible exam time slots. The total number of rows is equal to the number of students in your class plus one for the header.
- On the left column fill in the possible time slots based on your schedule. Each exam time slot could be 5 min or whatever you think you need, for example, 10 am - 10:05 am. Between two time slots, you may take 2 min to write down a grade and a comment about the student's performance. So, the next time slot woud be 10:07 am - 10:12 am.
- Inform students to pick a time slot by filling in their names on the right column. Each time slot can only have one student.
Tutorial on how to create a Word file on your OneDrive and grant students access to it
Please note: the above tutorial is for groups of students to work on their group Word file on OneDrive. But the steps are the same for both groups and the entire class.
Making the exam available
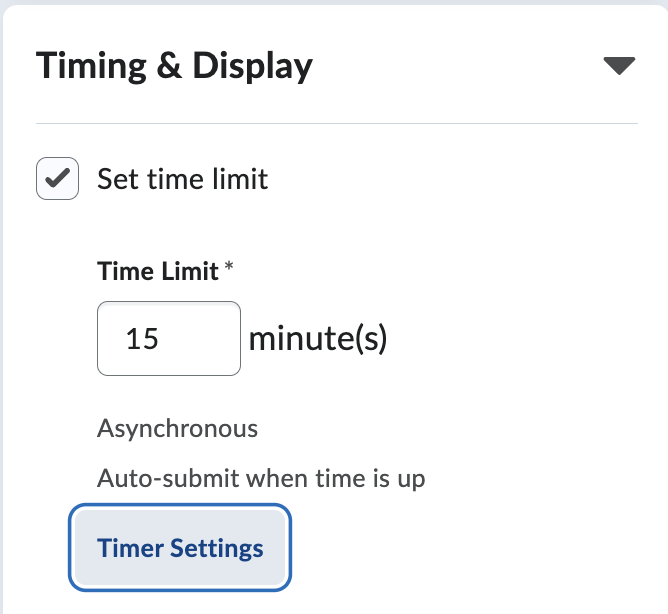
1. To set up the timer, expand the Timing & Display panel. Turn on the timer by checking the box for Set time limit abd then fill in the time each student will be given to see the questions and think about theor responses before their time to meet with you in Zoom, for example, 15 min. Click Timer Settings to choose Auto-submit.
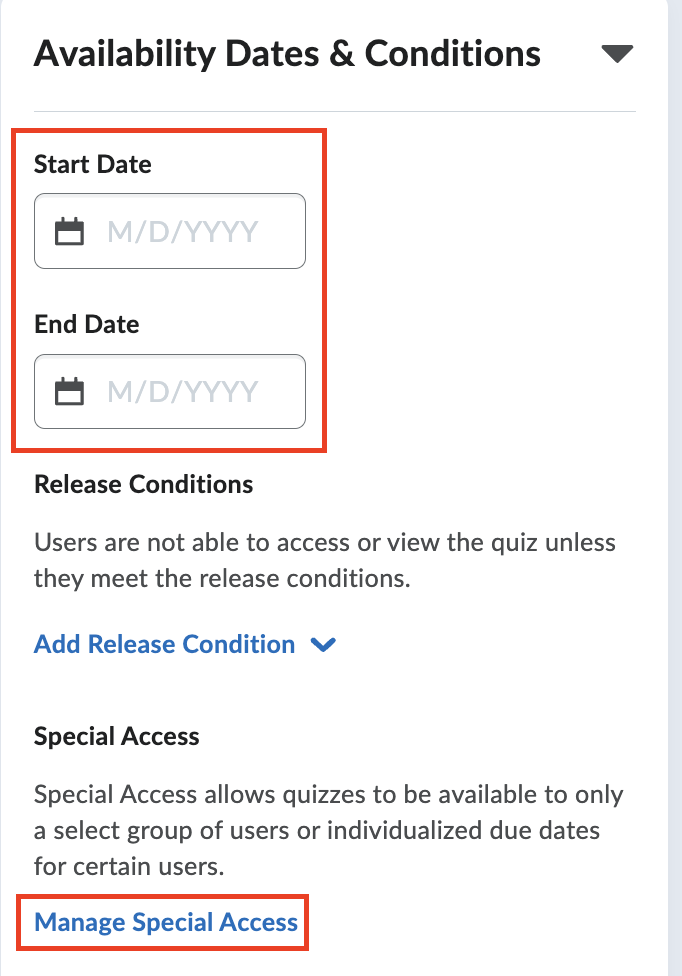
2. Then expand the panel for Availability Dates & Conditions at the top. Select the Start Date and End Date. They should be the entire time for all students to take the exam. Then, click Manage Special Access to set time slot for each of the students.
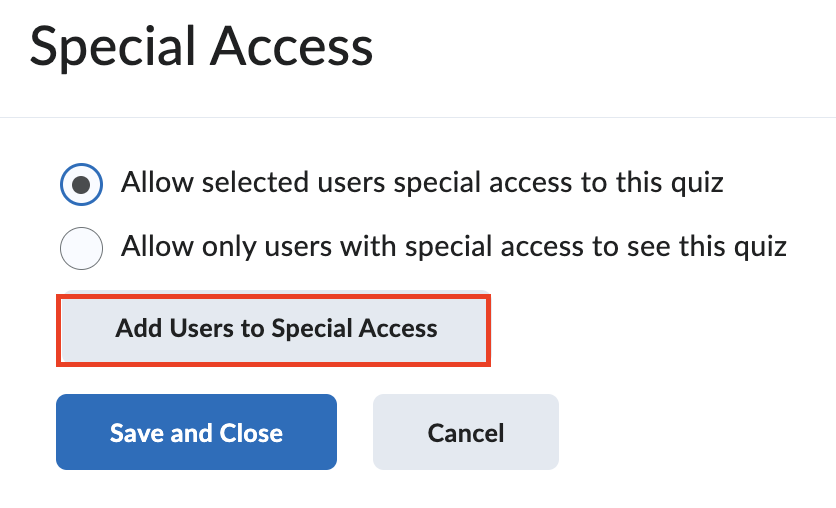
3. On the pop-up panel, click Add Users to Special Access.
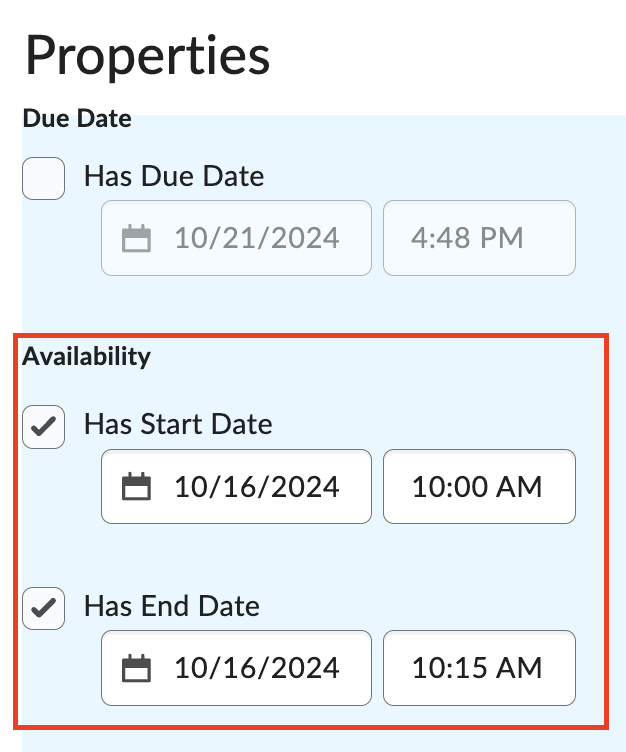
4. Under Availability, set up the time interval for a student.
5. Scroll down to Users section and check the box for the student who will have access to the exam questions in the time interval set in step 4. click the Save button at the bottom.
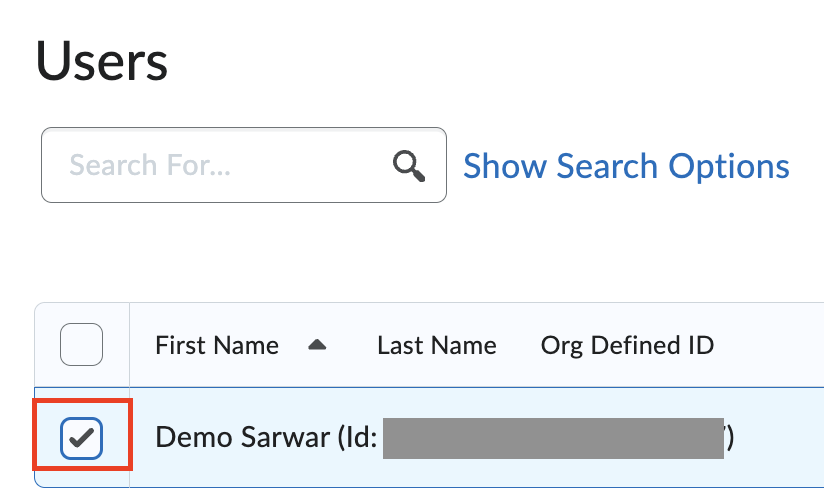
Repeat steps 3 - 5 to set up the time interval for all students. Then click the Save and Close button.
Now, you are back to the edit exam page. Click the Save and Close button at the bottom left to save all settings.
Creating online meeting sessions for the exam
Send an email to lmshelp@york.cuny.edu to request a Brightspace site for your oral exams. We'll create one site for each department whose faculty want to conduct oral exams.
After the Brightspace site is created and you are enrolled, you can create as many Bb Zoom sessions as necessary, each session could be for several students whose exam times are near one another. We'll enroll students in the course. When creating the Zoom sessions for the exam, make sure to turn on the Waiting Room so that you can ensure only one student on the schedule can access it.
Tutorial on how to create Zoom sessions from your course
At the time of the exam
If all goes right
- Students will click the exam link at their chosen time. Review and think about their answers to the questions within your pre-defined time interval. When the time is over, Brightspace will submit their exam automatically so that they cannot see the questions.
- They will then join the Zoom session individually and talk with you. You should record the session in case you want to review later. In this case, we recommend that you record the session to your computer as you will not share it with students.
- Based on students’ responses, assign a grade and record it in your course Grade Book.
What can go wrong - Mishaps and Solutions
- Plan ahead – give enough time for students to schedule the exam.
- If the audio on the Bb Collaborate session doesn't work, use the dial-in phone number for audio.
