Global Navigation Menu
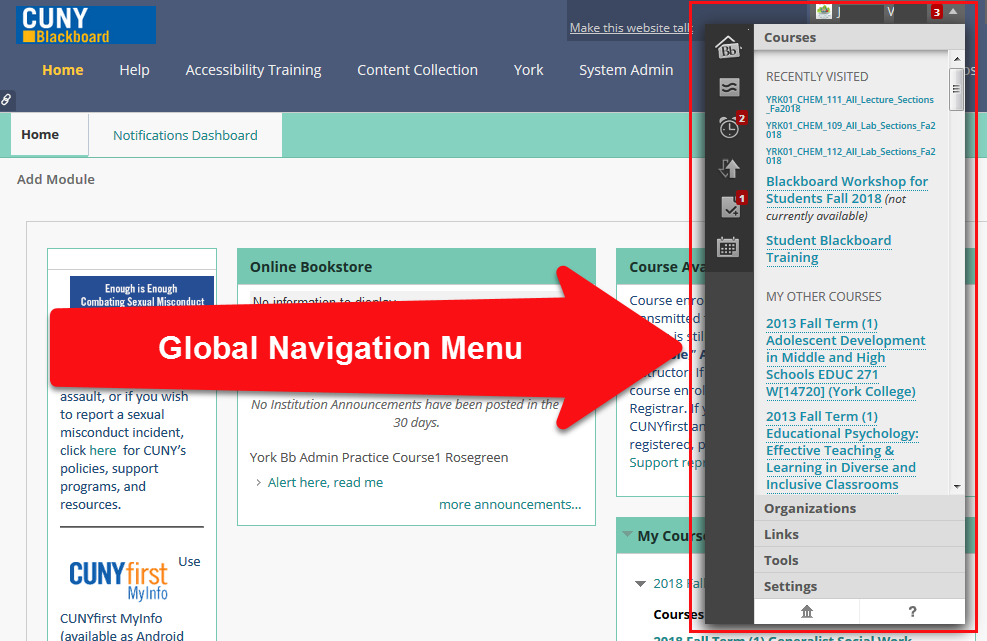
When you log into Blackboard, click the triangle next to your name on the top-right. This is your Global Navigation Menu which provides one-click access to your Courses, User Menu settings, Blackboard Help, and My Blackboard tools.
My Blackboard buttons
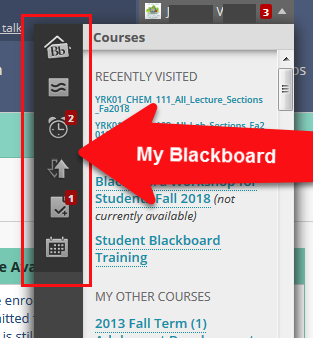
The My Blackboard buttons are located on the left-hand side.
Blackboard Home
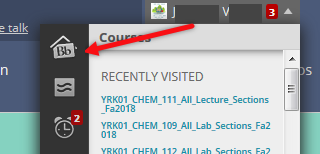
Blackboard Home provides an overview of items like Calendar, My Grades, and Posts.
Posts
Posts display recent responses located in your courses' Discussion Board, Blogs, Journals, and Wikis.
Updates
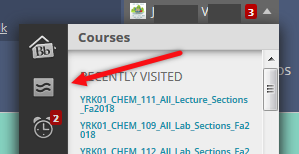
Updates are notifications across all courses and organizations in Blackboard. If the professors added announcements, documents, and exams, you could find them here. Updates are shown with a number on the right-hand side of the icon, indicating the number of unread notifications.
To view, on the top-right of a Blackboard page, click the triangle next to your name to open the Global Navigation Menu. Press the Update button and click on "Open" to view the item or "Dismiss" to ignore the item. The unread updates will be in yellow.

My Grades
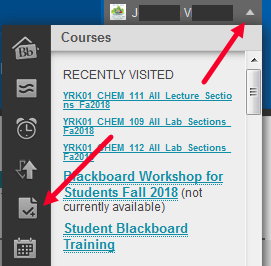
My Grades allows you to see grades from previous and existing courses.
To view, on the top-right of a Blackboard page, click the triangle next to your name to open the Global Navigation Menu. Then click the check mark icon (see a screenshot below). You can also view grades in your course navigation menu called "My Grades."
Calendar
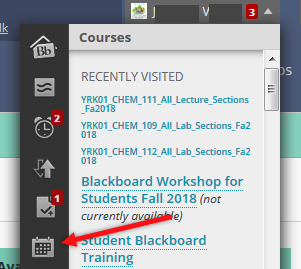
Calendar is your digital planner where you can view upcoming assignments, due dates and create events.
User Menu Tabs
Courses
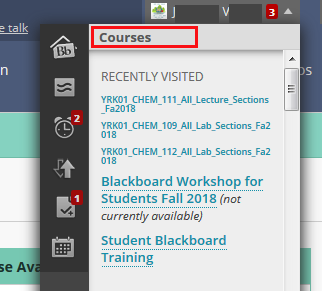
Another way to view your courses is through the Global Navigation Menu.
To view, on the top-right of a Blackboard page, click the triangle next to your name to open the Global Navigation Menu. You will see the course right away under Courses.
Tools
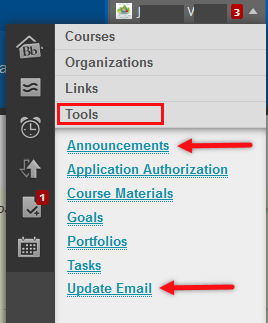
You can view Announcements from your current and previous courses. You can also update your email if necessary.
To check or update your email in Blackboard, on the top right of a Blackboard page, click the triangle next to your name. On the drop-down box, click on the "Tools" tab then "Update Email." Edit your email and select "Submit."
Settings
You can set the Text Size and High Contrast of the Blackboard screen. You can personalize with an avatar and edit email notifications too.
Personal Information: Changing your Avatar
To update your generic avatar, on the Global Navigation Menu, click the "Settings" tab at the bottom then click on "Personal Information."
Next, click on "Personalize My Settings," then click "Browse My Computer" button to find your photo or avatar. Last, click "Submit."
Edit Notifications Settings
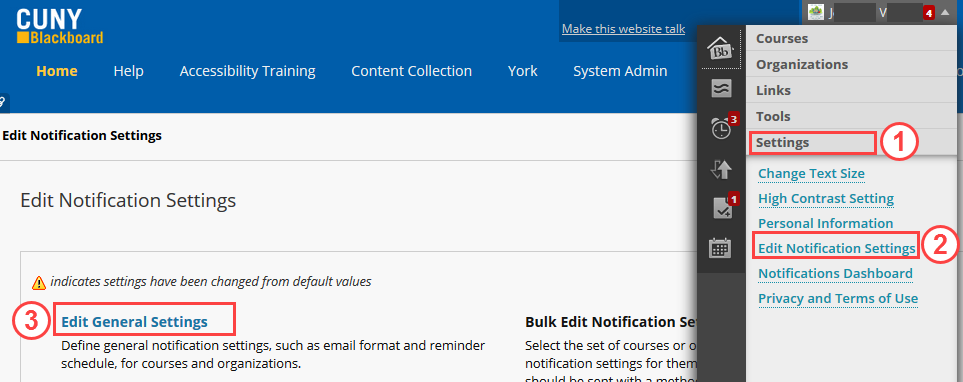
On the Global Navigation Menu, click on the "Settings" tab then "Edit Notification Settings." Select "Edit General Settings."
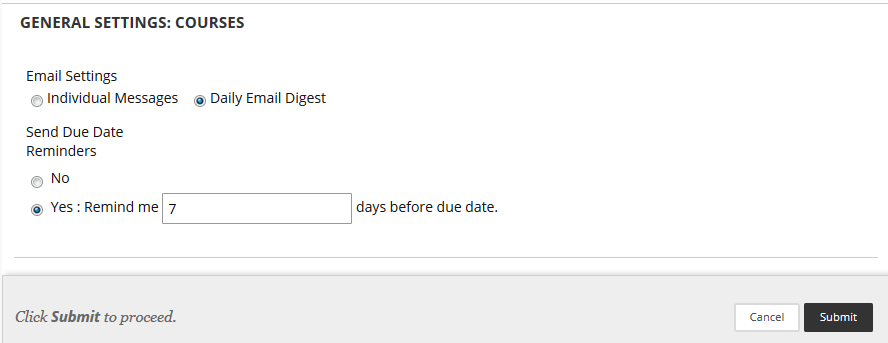
Under "General Settings: Courses" section, select your Email Settings where you can receive the notifications one at a time in Individual Messages or all together in Daily Email Digest. You can also set Due Date reminders. When all is set up to your liking, click on "Submit."
You can also view the Global Navigation and My Blackboard video to learn more about using them.
Aside from using the Global Navigation Menu, you can also personalize your course in the Blackboard Home page.
Organize your courses
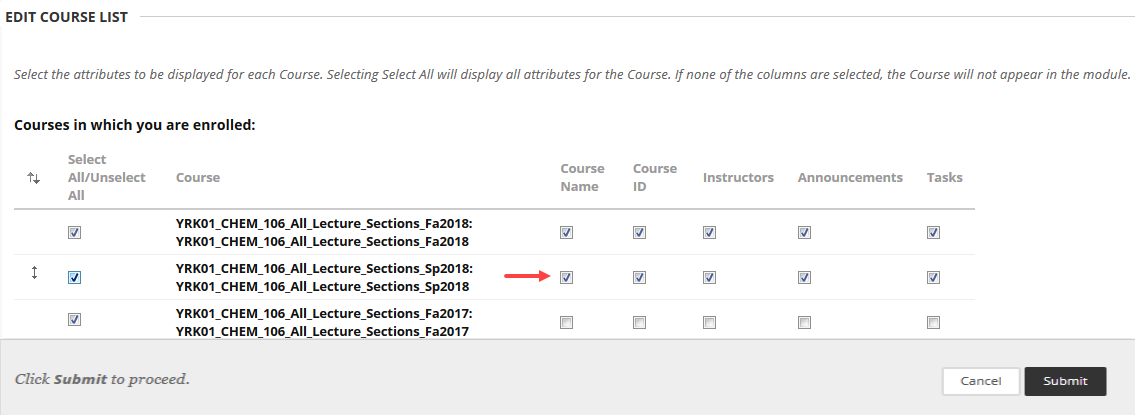
On Blackboard Home page, find My Courses module. Hover over the top right of this module, you will see a gear icon. Click on it to get on Personalize: My Courses page.

Hide past courses that I no longer need to access
In the Course Name column, uncheck the check-mark next to the course(s) you want to hide. Click Submit to save the change.
Using Terms
In Personalize: My Course page, check the check-mark Group by Terms to group your courses into their respective terms. Click Submit to save the change.

Re-Ordering Courses
In Personalize: My Course page, click and drag the double-end arrow icon next to the course check box to move courses.
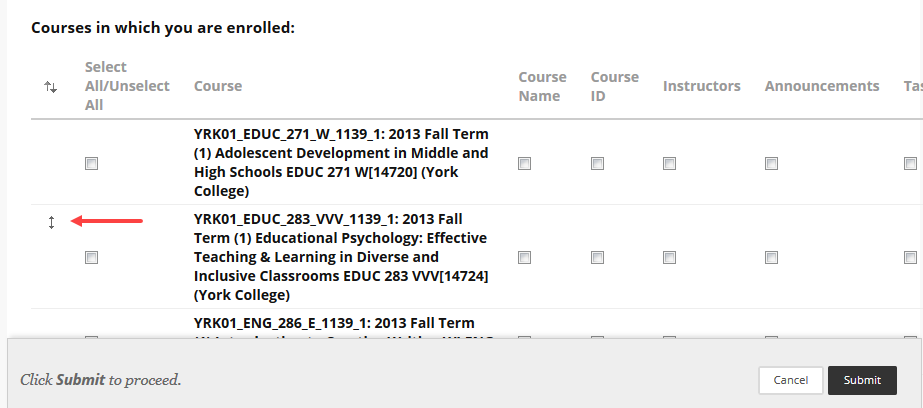
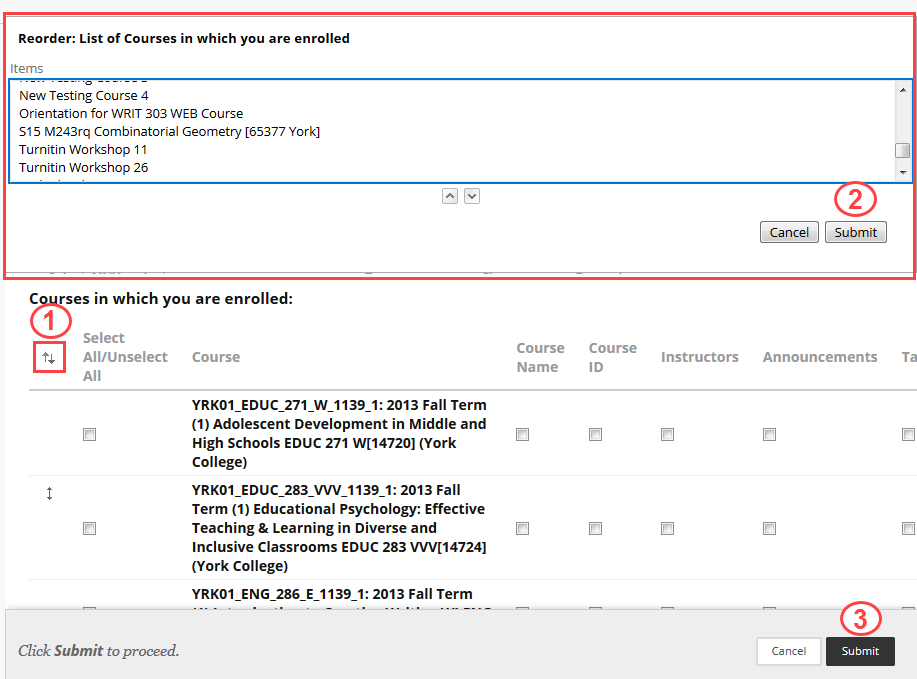
You can also click on the re-ordering button on the left of "Select All/Unselect All" column, select the course you wish to move and click the up or down buttons to move the column to the designated location. Next, click Submit in the reordering box. Click Submit again to save all changes.
